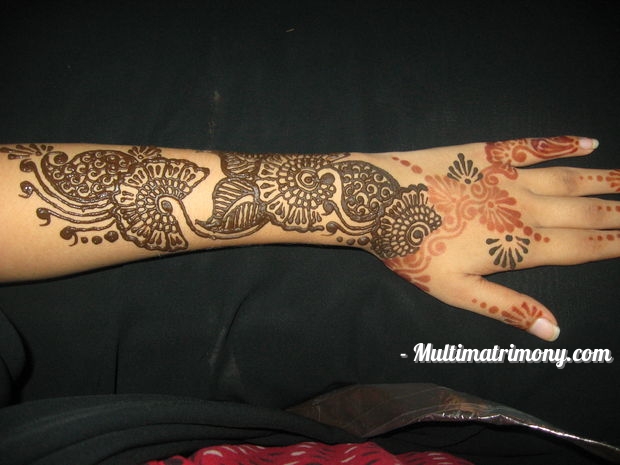
I have shown step by step pictures here, hope this makes clear how easy it is to do henna.
Step 1: Dots
you can add dots to your design anywhere you wish.i have added in descending order that is from big to small.
Step 2: Spiral
spiral can be used to fill empty spaces or can be used at the end of a stamen.
Step 3: Stamen
1.draw a curved line like showed in the picture
2.draw a small circle at the end of the line
3.fill the inside of the circle
4.and draw a small line outwards from the circle like showed in the picture.
Step 4: Comma
1. draw a dot
2. draw a line downwards joining the dot
Step 5: Petals
1 & 2 draw a half heart like shown
3 & 4. darken the top part by drawing a another line together with it
5. draw two straight comma’s inside the petal
Step 6: Flower
1.draw a spiral
2.out line the spiral
3.draw a line of scallops on the outline
4.draw another line of scallops on the first scallop line
5.draw the petals
6.make the top part of the petals thick
7.draw commas inside the petals
Step 7: Blossoms
1.draw a dot
2. draw a bit longer straight comma over it (see picture 2)
3. draw two straight commas either side of the first straight comma,it should be bit shorter than the 1st comma
4.continue drawing commas like shown in the picture,reduce the length little by little when going down
Step 8: Leaf
1.draw a leaf like shown in the picture
2. make the lines bit thicker
3. draw two lines in the middle which will end in the leaf point
4. and draw lines in the side ways
5.draw both the sides
Step 9: Mango
1.draw a small circle
2. draw a curved line like showed in the picture.
3. and finish it like shown in the picture.
4. make the line bold and fill the small circle
5. and fill inside with spirals
Step 10: How it looks on hand


